.jpg)
![]()
I used the delightful purples of My Precious Daughter for this file folder folio. The folder measures 7″x9″ and is a great size for holding cards and tags. Although I love every collection of Pion Design, I believe this newest collection is my favorite so far! I’m enclosing instructions on how to make this project.
1. For the sides of the folder, cut 2 pieces of card stock measuring 7″ x 12″ and score every 1″ down the shorter side for a total of 11 score lines. Fold these like a fan.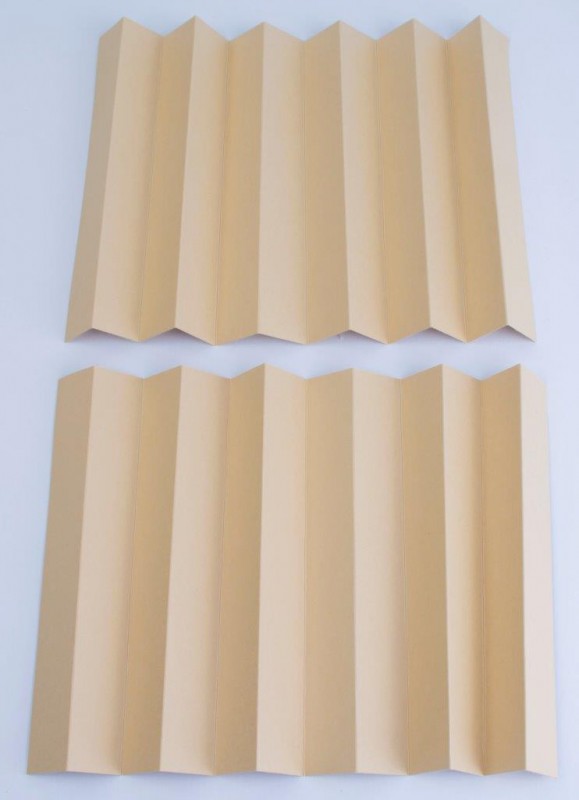
![]()
2. For the bottom of the folder, cut a piece of card stock measuring 8 7/8″ x 12″ and score every 1″ down the shorter side for 11 score lines. Fold these like a fan.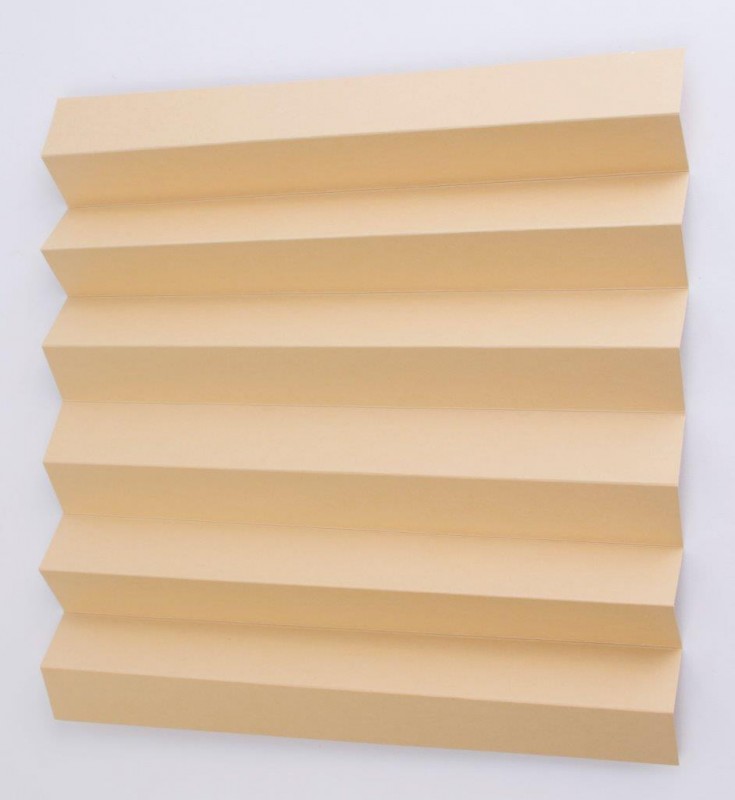
![]()
3. For the folder front, cut a 7″x9″ piece of card stock.
![]()
4. For the back and front flap, cut your card stock to 9″x10 1/4″. Score at 7″ and 7 3/4″ down the shorter side.![]()
5. Cut 5 pieces of card stock measuring 7″x9″. Cut a half circle in the center of the top of each of the pieces.![]()
6. Adhere these pieces to the folded sides.![]()
![]()
![]()
7. Insert the bottom folded piece between the 6 pieces as shown. Adhere the front and back flaps to the side flaps as shown.![]()
8. Adhere the front card stock piece onto the side flaps.![]()
![]()
9. Adhere the back card stock piece onto the back side flaps.![]()
![]()
![]()
10. Cover the project with the beautiful papers of Pion Design.
Have a special day!
Tara
Pion products:
My Precious Daughter ~ Julia’s dress PD4908
My Precious Daughter ~ Anemone PD4903
My Precious Daughter ~ Pansy PD4902
by DT ~ Tara
WOUW this is soooo beautiful Tara. You´ve just again made a gorgeous masterpiece here with these amazing papers. Soooo gorgeous looking and a really useful and perfect project, that can be used for sooo many great things.
This is beautiful, just like all you projects. I have to say I’m always excited when you bring out something new . Thank you for sharing . Marina :))
Oh Tara, this is totally brilliant!!! I adore projects like this and this is such a great design! Fab tutorial too with such clear instructions!! Am going to pin this so I can come back to it! Thank you, great inspiration!!
Mille mercis pour ce superbe tuto! Bises Nadine
Un proyecto super romantico , muy hermoso. Gracias por compartirlo. Que disfrutes de un hermoso fin de semana.
As always… it’s beautiful!!
thanks for the tutorial 🙂